UKclimbing.com have just published a review I have written of the Edelrid Beast Lite crampons. This post is basically an addendum to that noting a problem that has since arisen with the crampons since I filed the review.
I got the crampons unfortunately near to the close of this year's rather truncated Finnish ice climbing season but I still managed to get out and use them on several hundred metres of steep ice divided over lots of pitches and a number of days. It wasn't a whole season of weekend usage, but I still felt pretty confident in my conclusions on the strong and weak points of this rather novel model of crampon. The most noticeable thing about the Beast Lites is (unsurprisingly, considering their name) their low weight, so when I was packing for a ski-mountaineering trip to Norway just before Easter I threw the Beasts into my bag because, despite being a technical climbing crampon by design, they weigh less than even a pair of 10-point walking crampons I own. It was actually on taking them out of my pack to use to scramble up on to the blocky summit of the Senja peak Kvænen where I noticed that plastic heal clip of one of the crampons had cracked through (see the pictures below).
I know that heel bail clips like these don't need to break and that plastic is a very suitable material to make these components from; my Grivel G12s are now well over a decade old and the heel bails are fine. and on my first pair of DMM Terminators it was the metal frame of the crampon that broke after 8 seasons of hard use not the bails. It seems very unlikely that this could be simply bad luck after, relatively speaking, so little use. So I suspect there is a problem either with the type of plastic that Edelrid have used here or the shape and design of the heel clip that led to the breakage. It maybe that in trying to make the crampons so light they simply used too thin plastic here.
Saturday, May 03, 2014
Wednesday, February 19, 2014
Marmot Isotherm Hoody/Polartec Alpha Insulation - some thoughts.
| The Marmot Isotherm Hoody being used as a mid-layer on a -20 day. |
The Isotherm hoody is Marmot's first go
at using Polartec's new Alpha insulation, an insulation originally
developed by Polartec for US Special Forces. The military wanted a
synthetic insulation that while warm was also breathable and could be
kept on during periods of activity. With body armour, plus all the
equipment carried by modern soldiers on their webbing, donning or
taking off layers of clothing below all that is obviously difficult
in anything beyond relaxed and safe situations hence the requirement
for insulation that breathes well when you are active in it. The
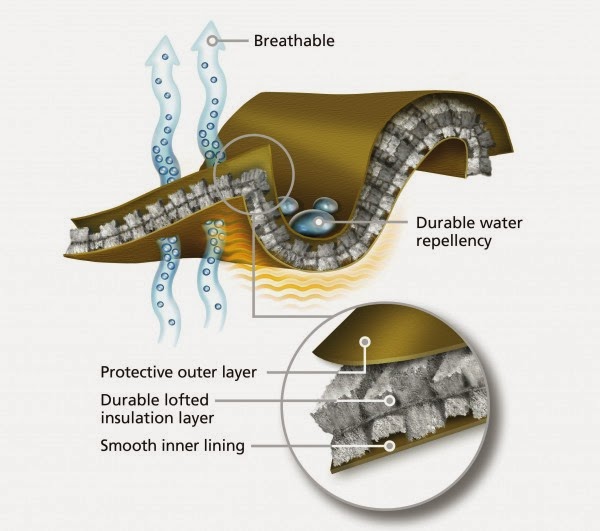
Alpha insulation is knitted onto a mesh, allowing 'sheets' of the
insulation to made and sewn into garments. The knitted construction
is very air-permeable meaning breathability, but also means the
insulation is stable and drapes well. This allows for simple garment
designs that don't require extensive channels through the
construction, as would be necessary to hold a loose insulation like down.
The Alpha insulation is though encased in an inner and outer shell.
Again because of the stable, knitted structure of the insulation,
manufacturers can use as an inner layer a very breathable and light
mesh material (again a loose insulation like down would escape
through such a material). With the Isotherm Hoody Marmot have used a
mesh version of their own dri-clime material for most of the inner
liner.
![]() |
| Graphic from Polartec, click here for more info. |
With Polartec Alpha's unique selling
point being breathability I feel the choice of outer material to the
insulation is vital. Insulation works by holding air still, creating
a barrier of stable, warm air between the person inside the clothing
and the colder, moving air in the environment beyond – so there
needs to be a windproof layer over the insulation to allow for this
to happen. This would seem to be where the central dilemma with
Polartec Alpha lies – for the material to insulate to its maximum
amount you need to use a windproof outer fabric but this may not be
particularly breathable, but to get the most out of the insulation's
structure which is what Polartec says makes Alpha more breathable
than competitor synthetic insulations, you want an outer fabric that
is highly breathable, which generally means less windproof. The new
buzz-phrase in the industry for this is “air permeability”; for
instance the new Goretex Pro is air-permeable as is Polartec NeoShell
making both of these fabrics more breathable than other waterproof
fabrics, but the other way of putting this is “not as windproof”
and that might not sell as well in the 'performance outdoor clothing'
market. For the outside of the Isotherm Hoody, Marmot have gone with
Pertex Quantum, a light ripstop nylon. There are different types of
Pertex and I'm not sure if certain forms are more windproof and less
breathable than others – but Quantum is an ultra-fine and smooth
weave so I would imagine that it isn't particularly air-permeable,
although of course being windproof allows the Alpha insulation below
to insulate all the better.
![]() |
| Some slightly freaky google auto-produced multilayer pic of me mountain-biking in the Isotherm. |
So that's the physics theory section;
but what about in use? Well, in truth it is a bit of a mixed bag.
Let's start with the good stuff; the Thermo Hoody is very light (387
grams in medium, about 20 grams less than Marmot claim) and very
compressible – it is very easy to stuff into a bag to take along
'just in case'. The hood (a simple under-helmet design) adds instant
warmth when used although it isn't designed to zip up and protect
your face. Considering how light the materials are too, it seems
relatively tough – it survived a day of gritstone cragging when it
was far too cold for me to worry much about not scuffing and scraping
it. Marmot have used a stretchy light softshell material over the
shoulders to make it a bit tougher for use with a rucksack. It's easy
to care for too, particularly in comparison to lightweight down tops.
If it gets grubby you just chuck it in the machine for a wash. For me
the downsides are the fit and the design. I've been a big fan of
Marmot for years as their quality seems top-notch and their size
medium has always fitted me well, but with the Thermo Hoody the
medium is too tight across the shoulders although it's not
particularly trim around the waist so its seems a bit oddly
proportioned. Perhaps related to this I've also found it doesn't work
brilliantly with a harness with a tendency to pull out after some
high reaches. A climbing harness covers the hand warmer pockets too,
which considering Alpha is all about “active insulation” - so
insulation to wear whilst doing stuff, like climbing! - seems a
shame. Another minor design flaw is that the lining in the sleeves is
too loose so when ever you pull the jacket on the inner fabric pulls
out, protruding beyond the cuff. It goes back in easily enough if you
hold the cuff and stretch the sleeves a bit, but it's enough of an
annoyance to notice.
And finally to the big issue – is it
breathable and how much warmth does it offer? Used as an outer layer
for things like autumnal mountain biking I found the Isotherm snug,
wind resistant and warm but perhaps a bit too warm. Despite not
riding particularly hard or doing long climbs, in positive single
digit temperatures the inside of the Isotherm was getting rather damp
with sweat being worn over just a thin base layer. This would
dissipate with time, but then I've found the same true of traditional
synthetically insulated pieces like the Marmot Variant. Through the
damp cool autumn Alpha didn't strike me as that different and I was
left wondering – was it the Pertex Quantum material holding in the
sweat or the Alpha insulation itself? For cool weather rock climbing,
the jacket was more successful, not getting sweaty inside and keeping
me reasonably comfortable while climbing on what was a ridiculously
windy day at a rather exposed English gritstone edge. The day was so
windy though, that although it wasn't particularly cold (about +5) I
still needed to use a duvet over the Isotherm when not climbing –
in those gales you notice the air permeability by getting cold! So
good for less aerobic activities like rock climbing but I don't think
the Isotherm is necessarily the best cragging top for the reasons
mentioned earlier; it would need to be longer, have differently
positioned pockets and perhaps a slightly heavier, tougher face
fabric for that. I have used it as a mid-layer under a Marmot
NeoShell jacket in cold and very cold conditions, and here it worked
impeccably. This has included Nordic skating at -20 and alpine skiing at just below freezing. But in both these cases I suspect a
hi-loft fleece would have also worked as well as a mid-layer.
![]() |
| Cragging at the Roaches in the Isotherm Hoody |
Wednesday, January 08, 2014
Physics you can sleep on; a design weakness in the Alpkit Numo sleeping mat.
| Bikepack bivvying - my Alpkit Numo under my tarp |
Warning: very geeky camping gear post follows;
surf away now if you don't care and most well adjusted people
probably don't.
A camping mat is pretty fundamental to
getting a decent night's sleep when camping – whatever you pick is
a compromise; the light ones might not be tough, the tough ones not
light, the light, tough ones not cheap etc. In summer you can get away
with more (well, actually less); find some softish, non-rocky ground and even the lightest
closed cell foam mat can be great, but on hard uneven ground and as
winter approaches the mat becomes more important.
| Winter bivvy, in a laavu (Finnish lean-to log shelter) |
I got an Alpkit Numo a few years back and have like it. It's one of the new generation of air mattresses - you blow into it
and it fills up like a balloon - very light and compact. I had always thought that just
getting you off the ground, so that heat can not move by conduction
away from your body into the ground as you sleep, was central to how
sleeping mats of all types worked but using the Numo demonstrates
it's more complicated than that. Once inflated the Numo probably is
about 10 cms thick – a lot more than most Thermarest style mats (a
couple of cms) or closed cell foam mats (>1 cm). This makes it
super comfy but also allows for some interesting physics – because
the Numo is just air inside (thermarests hold air in a complex lattice
of open cell foam that it inside the mat) you get convection currents
in it. Because the air can move inside the mat as it cools it will
move around - not working well as insulation. Alpkit obviously knew
this as in the body section of the mat (about shoulder to bum) they
put insulation, this was some sort of synthetic strands stuck to the
two inside-sides of the mat. When you blow the mat up this stretches
forming a lattice structure and stoping convection in that section of
the mat.
| Late summer bivvy. |
The difference this insulation made is
very noticeable – I first sussed this on a wild autumn night in
upper Glen Nevis, near Steall waterfall. It wasn't terribly cold,
maybe around 5 degrees and I had a bag plenty warm enough. I slept
fine but it was quite noticeable that whilst my body was warm my legs
(where there is no insulation in the Numo) were getting cold from
below – just like the feeling of trying to sleep on ice with a too
thin mat. Hence despite being both really comfy and also light and
the most packable of my mats, I decided it was best to use it for
3-season camping only.
In the pictures above, on the left you can see the insulation still adhering to one side of the mat but on the right you can see where most of the insulation has come detached and collapsed back on itself.
This is issue is compounded by the
design problem with the mats – the insulation comes unstuck from
one side of the mat and collapses back against the other side hence
doing nothing. When I first noticed this with my first Numo, Alpkit
in their normal very customer-first way said “no worries, we'll
send you a new one”, but then the same thing happened with our
second Numo (my wife had discovered how much comfier my Numo was than her old thermarest), and then more recently
with the replacement to the original one. I've come to the conclusion
that you can get about two weeks use out a Numo before the insulation
peels away. I used one of them in that state on my recent bikepacking
trip where it was just below freezing at night and even sleeping on
the wooden floor of the laavu, I got cold enough from below to wake
me up (the first night in my tent in the car park I had slept
perfectly on my much thinner foam Z-rest). So the failure of the
insulation really limits the Numos to summer use only.
![]() |
| Slightly grumpy bikepacker in the morning twilight after a long chilly December night on a not warm enough mat. |
Alpkit admitted that the problem is
that when you breath into the mat blowing it up – they aren't self
inflating like Thermarests – the moisture in your breath gets
trapped and the sogginess inside makes the glue holding the
insulation in place fail. Alpkit have stopped making the Numos and
aren't going to do any more – they told me they're redesigning
their whole mat range for next summer – so of course that makes
this whole post sort of pointless: if you don't have a Numo you can't
buy one and if you do have one and it fails in the way mine did,
Alpkit can't really do anything about it now. But at least I've
proven to my own satisfaction that air alone isn't sufficient
insulator for sleeping. I guess it has to be stable air that can't
circulate, and the problem also shows how small a sealed space
-inside an air mattress- is enough for convection currents to have a
significant impact on the insulation quality of that mat.
Labels:
bikepacking,
camping,
outdoor gear
Sunday, December 08, 2013
An early winter bikepack
It seems that a late November weekend scout camp is now part of my kids's annual schedule, so a couple of Fridays back I found myself back up in the Forssa area, about 100 kms northwest of Helsinki with 36 hours to kill. It was mid-evening, slightly below freezing and very very dark. Last year I had taken my mountain bike and tried bikepacking the hiking route, the Lynx Route/Ilvesreitti, with limited success. The 'trail' was marked by waymarks but not enough people had actually walked it to make much of trail on the ground. I did a lot of pushing and carrying the bike through forest brush. This year I decided to stick to roads and forest tracks, including riding sections of the long distance bike route the Häme OxRoad/Hämeen Härkätie, that goes from Turku to Hämeenlinna, so took my cyclocross bike. A lot of the roads and trails are unsurfaced so the CX was a great choice, I could nip along paved sections at a decent pace, but had plenty of grip on the gravel.
Last year it was grey and just above
freezing for the whole trip, and in November in Finland the days are
so short and the sun always so low that it brings a whole new drab
meaning to “grey”. This year I lucked out and the sky cleared
early on Saturday morning and stayed clear until after I was asleep
that evening, the temperature never got above 1 degree and was often
just below freezing according to the thermometer on my excellent
newish bike computer.
I camped in a carpark in LiesjärviNational Park on Friday night with the luxury of a tent and left the
car (and tent) there on Saturday morning. That day I rode a bit over
90 kms; this included some hiking single track in the Saari Folk Park
but mostly was on unsurfaced roads and forest tracks. A good day of
gravel grinding. It didn't feel that big a day but I ran out of
daylight and had to ride the last hour or so with lights on to get to
the laavu (lean-to shelter) I had decided to use that night. This was
actually the same one as I had camped in last year, but it was much
nicer this time with all the stars out above and no wind.
I lit a fire in the fireplace with out
much trouble, although it never really got to that pleasantly roaring
stage. There was only the dregs of the woodpile left, I guess after a
summer of visitors, and although the logs burnt they didn't seem to
put out much heat. I made lots of hot drinks to rehydrate – it's
easy to not drink enough riding in cold weather – and ate my
dubious far-eastern pot noddle thingy for supper, but with an
indifferent fire retired to my sleeping bag very early.
Sunday morning, I didn't have much time
before needing to go and pick my son up from scout camp so got up
early, made some hot drinks with breakfast and packed up. It was
still only getting light as I left the laavu and the moon was
shining brightly over the lake. I only needed to ride about 20 kms
back to my car that morning. It had snowed over nigh; enough to make
most of the world white but not enough to bother me in terms of
riding. My new tyres seemed to grip through the snow perfectly well
and reasonably soon I was back where I had started and putting the
bike back on the car.
Overall, the Häme Lake Uplands area is
nice region to ride and the available map designed for hikers andother outdoors user is a great resourse. The roads away from a couple
of highways, that I only crossed, are almost deserted. I reckon only
around a dozen cars went past me all day. At this time of year in
particular though, it is rather lonely – even though there are
national parks with the related infrastructure you might expect,
everything was closed. I found one cafe in the post office in Porras
open, where I had a lovely chat with the ladies picking up their
parcels and having coffee (I suspect and Englishman on a bike
speaking very bad Finnish might have been one of the more novel
events of their day), but beyond that I went past no open shop, cafe
or similar. Make sure you have enough food with you. There are also large numbers of abandoned and decaying buildings in the area, barns and old farm houses like this are quite normal in rural Finland, but the empty petrol station and shops (see photos above) had an unnerving feeling of looking a bit too much like a scene from "The Walking Dead".
Of course you can camp pretty much anywhere, but I pushed on to get to a laavu I used last year – knowing it was great spot and has a fireplace, wood and a compost loo. But because of the hiking, riding, canoeing and cycling routes around that area there are quite a few similar laavus around.
I had new tyres for the trip, SchwalbeMarathon Plus Tours. I was still using my original Marathon Pluses
through this summer on that bike. They came on my last bike and have
been absolutely superb. I must have done at least 10,000 kms over five years on them
and have never had a puncture but they're showing their age with the
sidewalls beginning to crack and the tread must be wearing somewhat
even if it doesn't look like it. I've ridden a few cyclocross races
this autumn and using my light CX tyres and have had a puncture in
one race then a double puncture in the next – all pinch flats from
hitting rocks and having the tyres blown up firm doesn't seem to
help. Hence deciding to try the Marathon Plus Tours – the same
hopefully bombproof construction as the normal Marathon Plus, but
with a bit of tread that seemed more suited for gravel roads and
forest tracks of Finland. On this trip they were great – the grip
felt great, even on Sunday morning riding back on snow. The only
downer is that with those very meat tyres plus mudguards on, the bike
felt bloody heavy. I'm not sure if serious CXers would want to race
on them, although for me if they didn't puncture it would offset any
slowness caused by their weight. For touring like this though they
seem perfect, hopefully I'll get 10,000 trouble free kilometres out
of this pair.
For cold weather bikepacking you need a
bit more gear just to keep warm. I used the same set up as in September with my new Alpkit bikepacking bags and lashed-on dry bags
but also took a waist pack; just that bit more capacity than I needed
in summer. One of those bigger things for winter is the excellent
Jöttnar Fjörm down jacket that I'm reviewing for UKClimbing
currently. It's very warm and a nice “insurance” layer to have,
obviously designed as an belay jacket for ice climbing but works
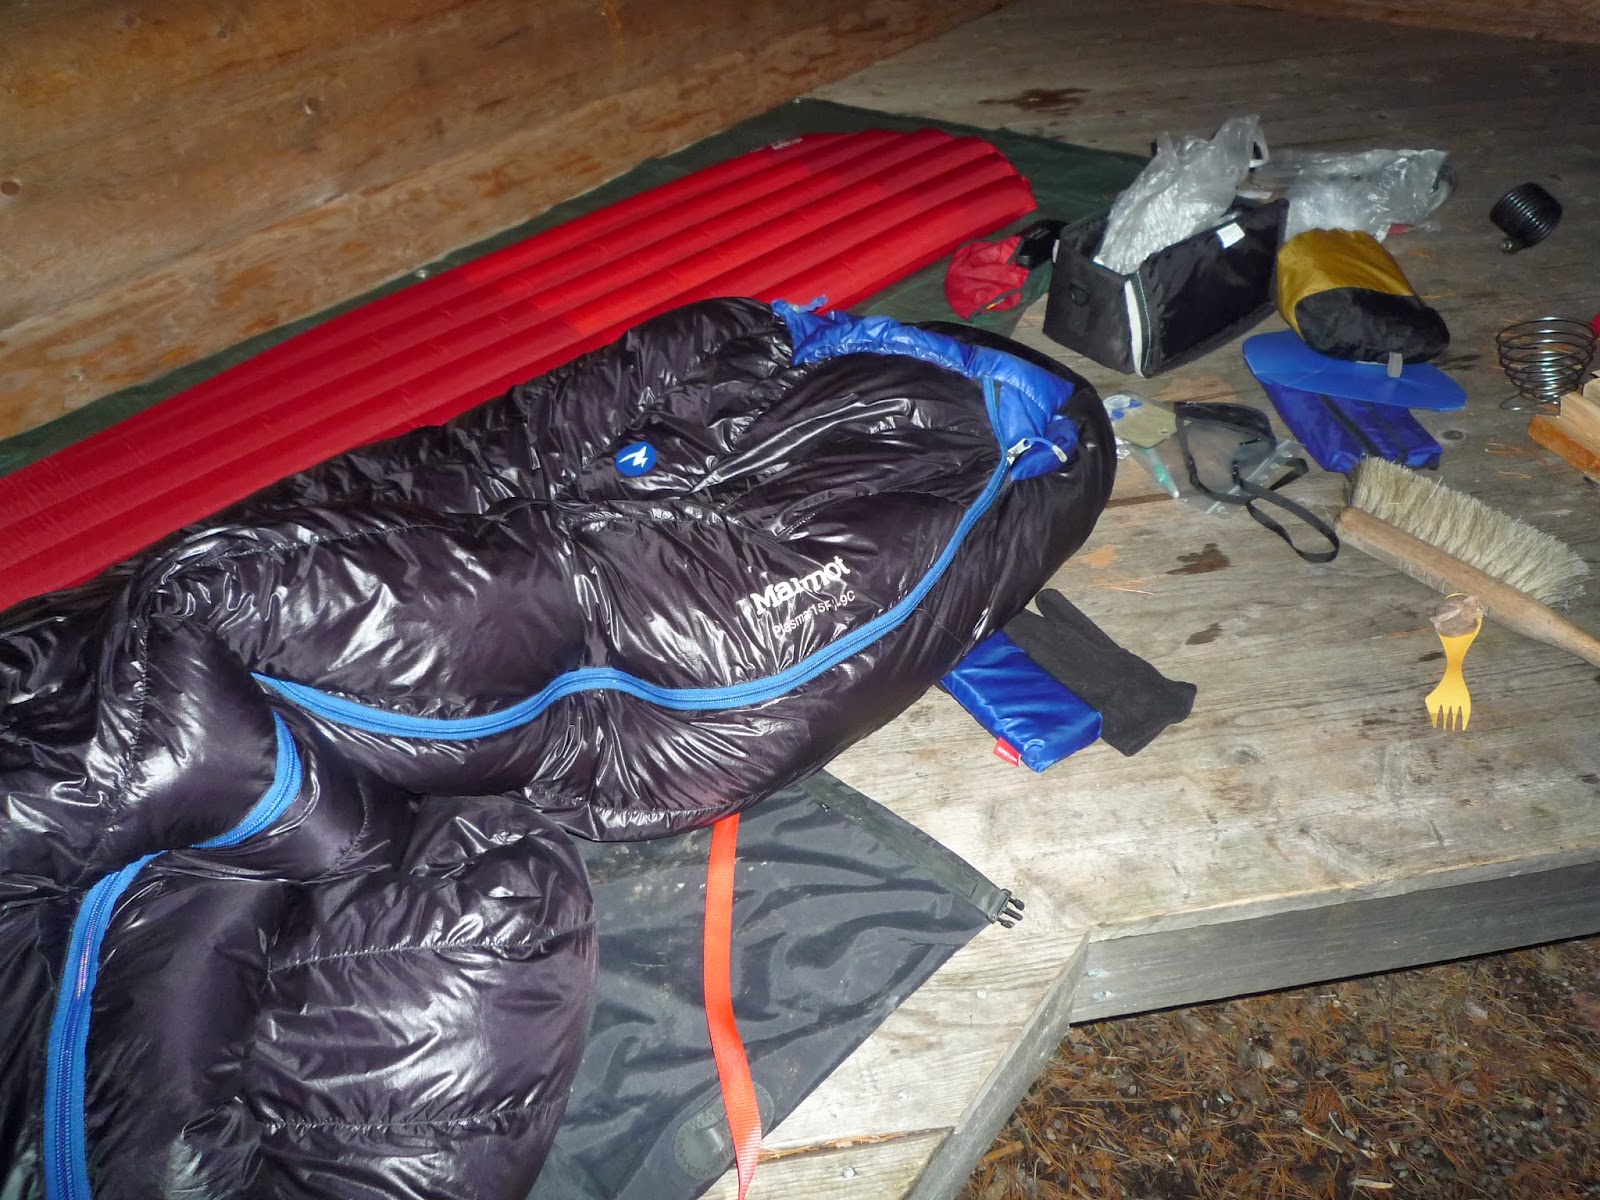
great for any cold weather camping. It was stuffed with my sleeping
bag in the dry bag that goes under saddle. This is fine when riding,
but I need a number of straps to hold it in place which makes getting
things out of the bag a hassle if you're not stopping for long. The
obvious if a bit expensive solution to this is to buy one of Alpkit'sKoala seat packs, meaning retrieving a jacket from the seat pack
would be easy, but I'm not convinced the Koala packs would fit as
much as my current arrangement despite supposedly being the same size
as my current dry bag I use there. Nevertheless, I know from winter
climbing that your belay jacket HAS to be easy to reach because
otherwise there is the temptation not to use it with the inevitable
downwards circle into shivering. I guess with cold weather bike
touring the situation is not dissimilar so I need to work this one
out.
Labels:
bikepacking,
cycling,
Finland,
outdoor gear,
photography
Wednesday, October 30, 2013
DMM Renegade 2 harness - a review
| Relaxing in the Renegade 2 at the top of the corner of Engelskdiederet, Eidetind. |
![]() |
| Simon borrowing the Renegade - fully adjustable to fit different sizes |
I stand by my original opinion that the Renegade, before and now in its updated "2" version, is an excellent all-round harness. It's not the lightest, but it is supportive when you need to hang in it for a long time; it has loads of racking possibilities; it is very adjustable allowing you to put it over winter layers or lend it to a differently sized mate; and at least the original one I know was very well made because it lasted so well.
| The stuff we lugged up Stetind, plenty of racks are helpful. The Renegade is the red and grey harness as the back. |
Some people, for reasons I never got, hated the racks on the Renegade 1. They sloped forward a bit, something that I never really noticed but others clearly did. On the Renegade 2 DMM have done away with the sloping style. They have though kept the same seven loop-layout that I love. There are climbers who I respect who say they've never felt the need for more than four gear loops even for complex trad climbing when you carry lots of stuff, but personally I love the ability to split big racks between the seven loops and know exactly where some bit of kit is going to be. When I went to Norway in August I took with me the Renegade 2 and another very nice Edelrid harness that I was reviewing for UKC. The Edelrid is great, nicely made and super-comfy for long days, but as we racked up for our big day on Stetind I took the Renegade 2 without much thought; I just knew I would want the familiar ability to spread a big rack out over the seven gear loops and find what I wanted quickly. I'm sure I would have done fine with the Edelrid too; but for the me the Renegade works so well for big routes and big racks, it is reassuring.
| Me sorting all the gear out on the summit of Stetind after 13 pitches of climbing; photo ©D. Smith |
| Where I broke the Renegade. |
Labels:
ice climbing,
outdoor gear,
rock climbing
Monday, October 28, 2013
DMM Shadow, DMM Alpha and DMM Aero quickdraws - a review
![]() |
| Simon escapes the dour Australian winter for some sunny Finnish sport climbing: lower bolt clipped with an Aero QD, upper with an Alpha QD |
DMM Aero quickdraws
The Aeros are DMM's budget plaingate krabs, they're kinda heavy by modern standards at 47 grams for the bent gate, but they are burly at 9kn gate-open and shop around and you can find them for as little as £12.50 for a full quickdraw. They don't come with the fancy variwidth dogbones that the more expensive quickdraws do, but with plain 16 mm nylon tapes that I find found perfectly comfortable to grab and cheat on! The gate is exactly the same as on the more expensive models and is fantastic - getting the rope in is easy even for a total clipping-klutz like me. So yeah, if you needed to carry a rack of twenty up some enduro-sports-monster pitch they're gonna be a bit heavy on your harness, but still nothing like scared-trad-climber-rack-heavy and you're more likely to be able to afford twenty of these!
DMM Alpha quickdraws
![]() |
| Gio doing a tricky move past the Alpha quickdraw |
DMM Shadow quickdraws
| The Shadow quickdraw (second runner down) on a trad route |
Thursday, September 19, 2013
Bikepacking - new bags, new camera.
| Autumn is here and the sky is full of skeins of geese |
| Packed up and ready to go |
| Quiet Finnish roads #1 |
| Quiet Finnish roads #2 |
I had thought perhaps optimistically that the mosquito season was now over so took a tarp but no mossie net. At first in the evening there were more than enough mossies to be annoying but interestingly later at night they all seemed to dissappear allowing me to sleep with my head out of my sleeping bag comfortably. It was just below 14 degrees when I went to bed (my new cycle computer very handily has a thermometer on it) and just below 12 when I woke up, so I'm now theorising that there must be some magic point between 12 and 14 degrees Celsius where its gets too cold for mosquitoes!
| The morning sun starting to burn away the mist |
| Overnight camp |
| The only nighttime visitor |
| Dew droplets on a spider's web |
![]() |
| Greeting the morning sun with coffee |
| Packed and ready to leave where I camped |
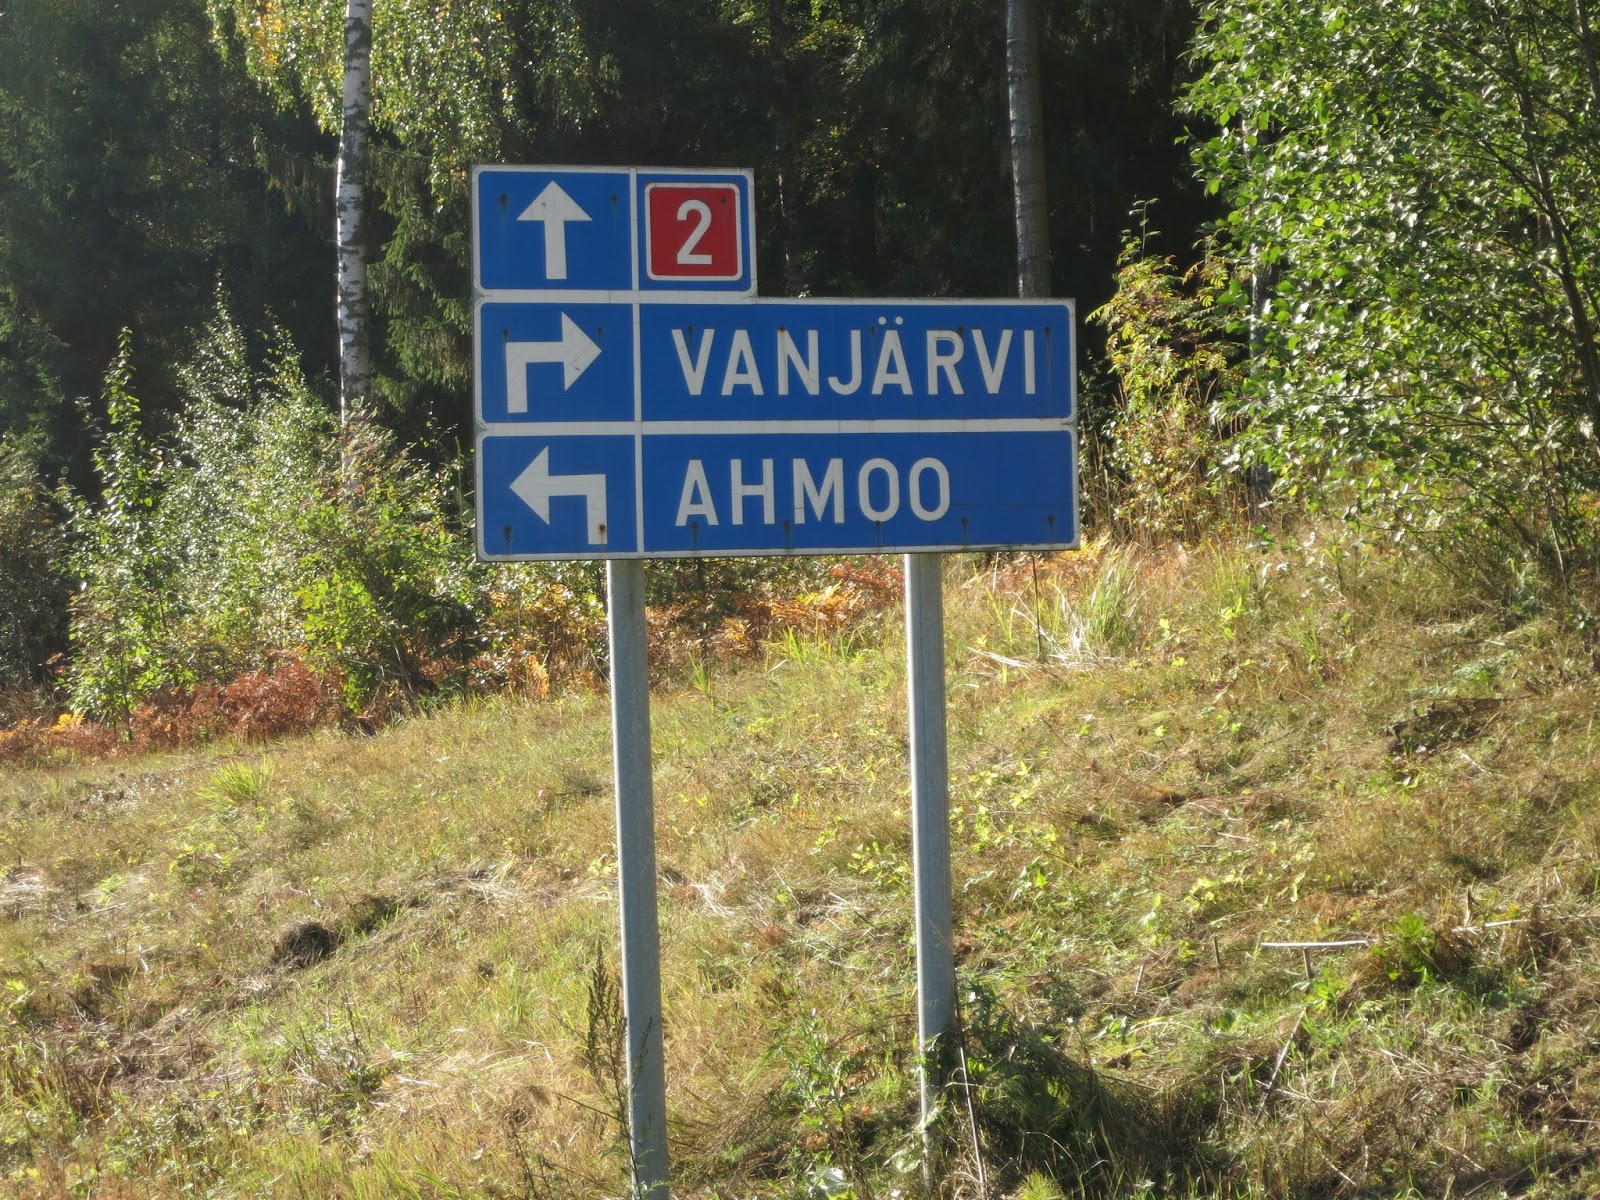
| It's probably not funny at all to Finns, but I would love to live in a place called "Ahmoo" |
![]() |
| Somewhere in the Finnish countryside |
![]() |
| The Alpkit "Fuel Pod", size large |
Labels:
bikepacking,
cycling,
Finland,
outdoor gear,
photography
Subscribe to:
Posts (Atom)