Friday, May 15, 2020

Vittoria Trail Tech G+ Tubeless Ready Folding Tyres


Vittoria Trail Tech tyres

I just bought a pair of "Vittoria Trail Tech Tubeless Ready Folding Tyres" on sale from Planet X; they're currently on sale for 14 quid each down from a claimed RRP of 40 quid - although I'm pretty certain Planet X never sold them for that price. Nevertheless, 14 quid for a tubeless-ready folding tyre really is a decent bargain. One thing though was, despite deploying my awesome Googling skills, I couldn't find out much about the tyres in advance of buying them. So now I've fitted them and used them, I thought I'd do a quick review just in case anyone else is thinking about buying a pair.

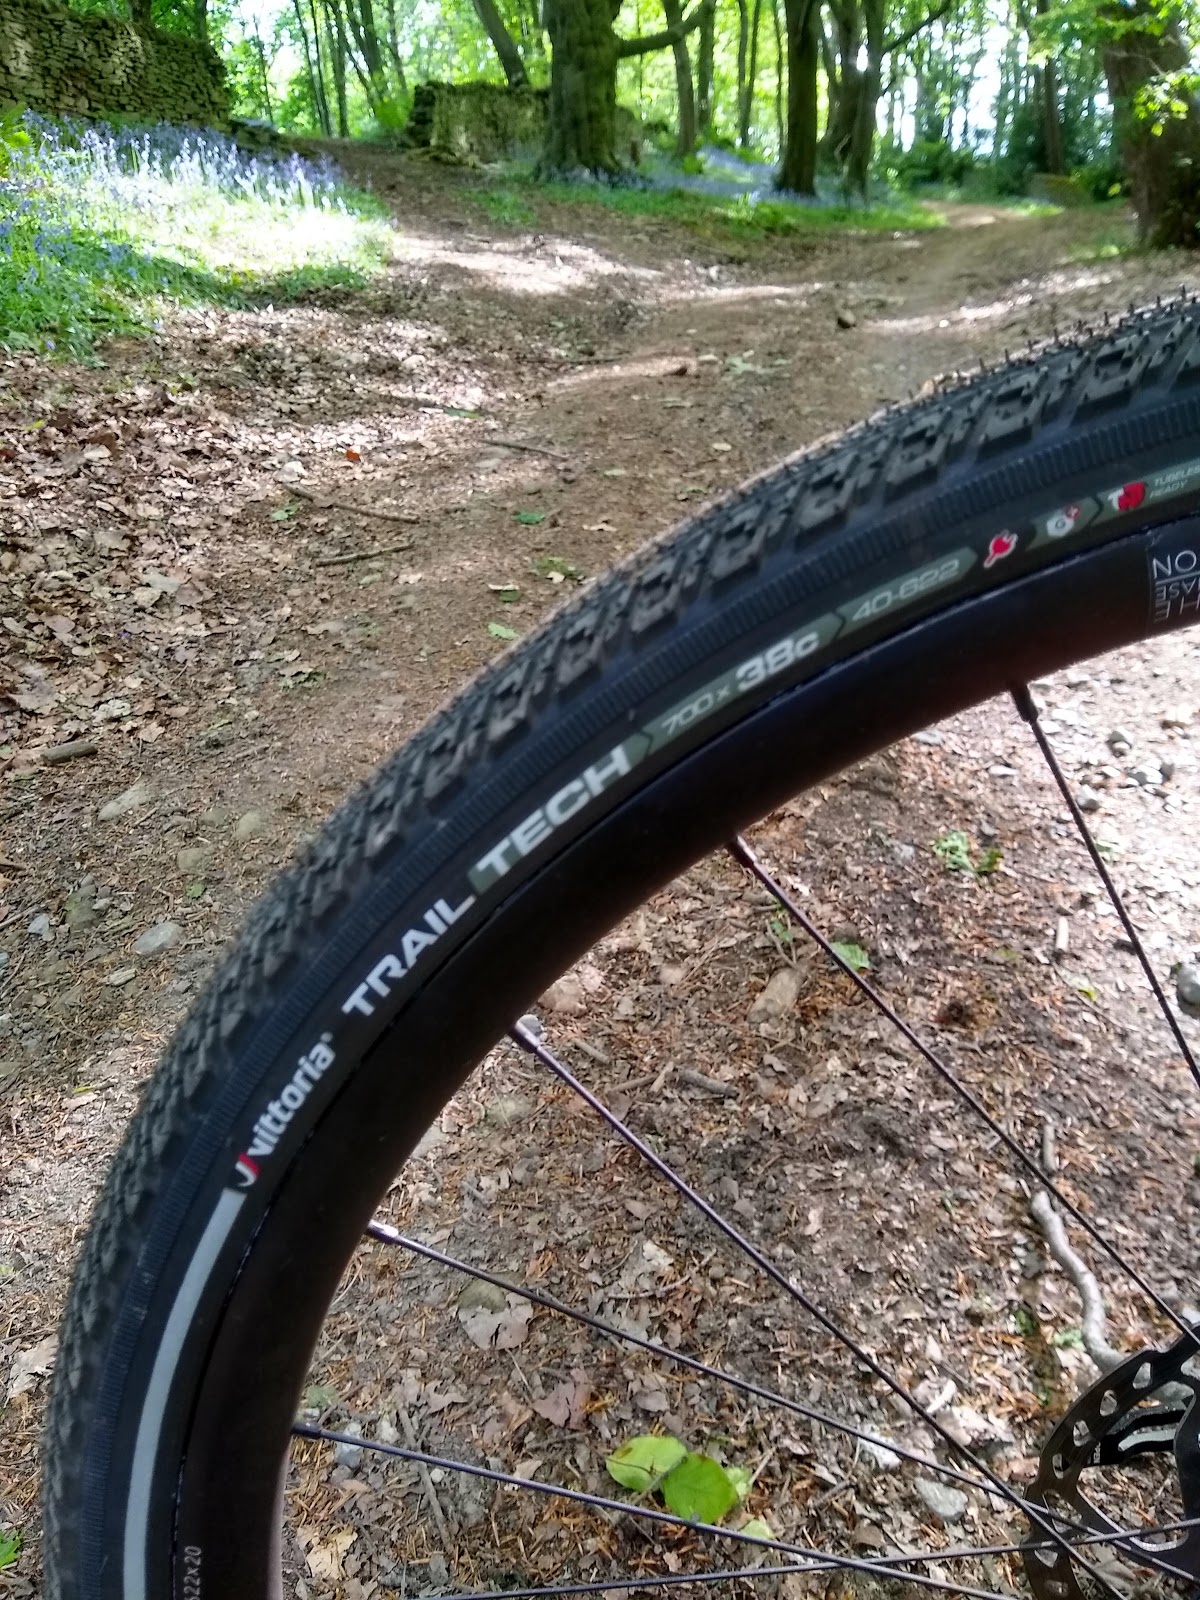
According to Strava I was much quicker up here than on my mountain bike!

The Vittoria tyres are replacing some Panracer Gravel King SKs, which are light, fast and feel super comfy to ride on, but back in December, on a cold early morning on my commute, I punctured one on sharp stone; covering my bike with sealant (which didn't work to seal the puncture). After much hassle removing the tubeless-valve I eventually got a spare tube and made it to work (late) and home again in the evening. After cleaning everything up I used a plug on the hole and re-mounted the tyres, but the plug never sealed and the tyre would go down in a couple of kms. After various hours getting very cold hands, out in the garage, over a number of nights and still failing to get a plug to work, I gave up and put an old super-heavy but almost puncture-proof Schwalbe Marathon Plus Tour, a tubed-tyre, on that wheel and got on with a cold winter of commuting. I bought special tubeless patches you glue on the inside of tyre of the damaged Gravel King, hoping that would fix it, so once I got the new wheels a few weeks ago, re-mounted it. But the patch wasn't working, it leaked at the original puncture, and as the pressure went down (sealant leaking out of the tread), it would also burp at the rim and sealant would start leaking there as well. So I'm not very impressed with the Gravel King SKs longevity. Buying a new one as a replacement was going to be slightly more than a pair of Vittoria Trail Techs at the sale price.


When I got the Trail Techs my first impression was weight! They felt more like the famously heavy Marathon Plus range. It felt a bit of a shame putting them on my lovely new light (for me at least) wheels - Hunt 4S Discs. I weighed one - 740 grams, so about double a Gravel King, but 150 grams less than the Marathon Tour Plus, and I don't need a tube in the Trail Techs so that saves another couple of hundred grams. So, yes, much heavier than the Panracers but quite a lot less than a tubed Marathon. The Trail Techs have a "Solid Shielding puncture protection layer" that, in the picture below that Google did turn up, looks quite similar to way Schwalbe makes Marathon Plus tyres so puncture resistant. Then of course, set up tubeless with sealant in them, I'm hoping punctures should be a non-issue. I do most of miles commuting to work so not puncturing, and making me late, is more important than saving a few hundred grams although it might make me a second or so slower on my regular Strava segments!

Borrowed picture showing puncture protection
When I first tried putting a Trail Tech on my rims it was a total battle. Having mounted different Schwalbe Marathon models over the years - famed for being hard to fit - this was upsetting as it calls into question my a) self-appointed expert tire changer status and b) manhood. After composing myself, wiping away the tears, and watching a few YouTube "how to fit tight tires" vids for inspiration, I had another go and buy really forcing the beads of the tyres in the well of the rim and working down, managed to get it on. Oddly the second tyre went on the second rim more easily, although I still wouldn't say it was easy! I had my home made compressor out ready to blast them on to the rim, but before doing that, thought I'd give it a few blasts with just the track pump so see if, on the off chance, that would work. I was quite amazed when, yep, it was that easy and after a few pumps the bead of the tyre clipped onto the rim with a couple of satisfying pops. Compared to the utter hassle of getting the Gravel Kings set up tubeless, this was a breeze.

So that was surprisingly easy!
I added sealant through the valves - all very nice and un-messy - and re-pumped them. They tyres say that tubeless the pressure should be a minimum of 45 PSI which seems quite high, and a max of 90 PSI - which seems amazingly high for a tubeless tyre - I think gravel kings say max of 60. I tried 50 PSI to start of with, but may drop it a bit as they felt relatively firm, although that might have just been due to being a heavier duty tyre than the Panracers.

Bridleway bashing...
I took the bike out on 25 km local loop and did both an ascent and descent that I normally ride on my mountain bike. On the ascent (Johnnygate Lane for any Sheffield/Chesterfield locals) I set a new PR according to Strava which I'm pretty happy with. It's really dry out currently, so on dry gravel and hard compacted mud (covered of course in Derbyshire's finest rocks, twigs, leaves etc.) the Trail Techs felt as good as the Gravel King SKs and better than the Schwalbe G-One Speeds my bike came with. Once onto tarmac they are noticeably quieter than the SKs and didn't feel squirrelly on fast descents on road.

...or tarmac cruising.
So after setting them up and a first ride - I'm pretty happy. Yes, they don't have tan sidewalls - so I'm not cool anymore but they seem to grip, in dry conditions at least, as well as the Panracers. Instead of tan sidewalls they do have a reflective sidewall and, again, as a commuter come the autumn I'll be happy about that. Reflective sidewalls are a great feature if you ride at night in traffic. If the Trail Techs turn out to be as puncture resistant as they look, particularly for commuting, that's a big plus. Yes, they're heavier than the Gravel Kings, but after getting hole that I couldn't fix in one, I had to replace it with heavy reliable tubed tire anyway - so the weight point has been moot for months anyway. And at £14.00 each versus £30.00, and being able to set up tubeless so easily, I reckon they're pretty good value.


Saturday, May 02, 2020

Hoka One One Tor Ultra Hi WP

I wrote this ages ago, and for one reason or another it never got used, so this is just a place to archive it really.


Many keen runners will have at least seen Hoka One One trail running shoes, with their big chubby soles they are hard to miss. While the rest of the running shoe industry seemed to be going for minimalist, ultra-light shoes with very little cushioning, Hoka went the other way – what is sometimes called ‘maximalist’ cushioning. The Hoka One One Tor Ultra Hi WPs (yes, silly name, I will just call them the Tors from now on) have applied that maximalist cushioning to walking boots. Alternatively you could perhaps think of them as supportive, protective trail shoes with an ankle added.

I have to admit the slightly bizarre aesthetics of the Tors is what first led me to ask if I could review a pair, but after six months of use I can now say they are despite looking odd they are fantastically comfortable and capable hiking boots. Compared to more traditional leather three season walking boots they are light (Hoka says 970 grams for a pair of UK 7s). They certainly feel light when you wear them, more like approach shoes than boots. I’ve even clipped them on to the back of my harness and carried them up rock routes – they are a bit bulky to be perfect for this but they aren’t too heavy. They are also just ridiculously comfortable compared to more “classic” walking boots. The biggest proof of this for me is that after a day of wearing them in the mountains I’m quite happy to just get in the car and drive home with them still on. Normally after a day in hiking boots or winter climbing boots there is that lovely feeling of pulling them off and putting your trainers on before getting in the car, but not with the Hoka One One Tors. Hoka say the boots have “late stage meta-rocker geometry, active foot frame stability” and “full length EVA top midsole for cushioning” – I’m sure this is all true although I don’t know exactly what it means. But, basically, whether walking for miles on flat hard surfaces like the flagstone sections of the Pennine Way over Kinder or hoping between rocks on bare, rock-strewn mountain tops like Tryfan, I found the Tors wonderfully comfortable. In many ways they feel like a comfy padded running shoe, but with more protection around your foot when bashing through scree and more support around your ankle when walking over rough terrain.


The boots are waterproofed by using an eVent liner and so far this has worked perfectly even for walking for long periods in very wet and muddy conditions. I’ve always been a bit suspicious of how long liners can last in boots, but I had a pair of Merrells with a Goretex liner that stayed waterproof for years despite loads of use, so hopefully these will last as well. The eVent also seems to breath well enough to keep my feet from getting to hot when the weather isn’t so lousy. I wouldn’t recommend these boots for summer hiking in hot weather, but for the UK except for high summer they seem well rather suited.

The Tors have a “Vibram® MegaGrip Hi-Traction Outsole with 5mm Lugs”. The grip offered by these soles has also turned out to be superb – the lugs grip well in mud and wet grass but the boots also work surprisingly well where friction is central – be that on lichen-covered grit boulders or slimey limestone slabs, and even more surprisingly on polished slabby holds on classic mountain scrambles. The last thing I expected from these boots is for them to work for scrambling, but having worn them up Tryfan’s North Ridge and Bristly Ridge they were great. They of course didn’t edge well on small positive holds like an alpine boot will due to the softness of the midsole, but on bigger holds and slabby moves they were just fine.

I’ve found just one problem with the Hokas, the stitching around the top of the ankle cuff (in cheery contrasting yellow thread) has snapped and is starting to unravel a bit. The swift application of lighter to the nylon thread will stop it unraveling any further, but this seems to be a problem with this sort of stitching on exposed sections of footwear, particularly where the thread is in a stretchy material like the neoprene cuff here. Another ‘issue’ which may or may not be seen as a problem is that the flat profile of the sole means that there is no groove for the underfoot strap of a gaiter. If you have gaiters with wire straps under-foot this might work although I picked up some shorty gaiters with a very narrow neoprene strap from Decathlon thinking they might works with the Tors, but they still don’t. As said before, the Tors seems very waterproof when walking through typical hill bogs but of course any boot will leak if water comes over the top, and I still think that gaiters have their place for hiking in Britain.

But, besides the gaiter issue, I think the Hoka One One Tor Ultra Hi WP are great boots for three season hiking in the UK, be that multiday backpacking on rolling (and often muddy) moorland or the more abrupt up and downs of the mountains. If you like the soft comfort and lack of weight of hiking in running shoes but want the protection, waterproofing, and traction of ‘proper’ hiking boots, then the Tors are well worth considering.

Monday, December 18, 2017

Scarpa Zodiac Tech GTX: a review

Summer scrambling
I was asked to review these boots for UKC back in early summer. Happy family reasons meant I spent little time in the mountains this summer and, despite hiking and scrambling in them in the Peak District, I held off writing up my review until recently as I wanted to use them in the mountains and with crampons. By the time I submitted my copy, Scarpa UK had just removed them from their website as they are not selling them next year. It real shame as they are cracking boots, but I thought I'd park the review here for archive purposes. Some UK shops still have the Zodiac Techs in stock and they are still on Scarpa's international website as well as for sale from many webshops across Europe. So I hope that this review is of help to any random googlers who find it when researching the boots.

The Scarpa Zodiac Tech GTX are an impressively light pair of mountaineering boots. The first version of Zodiacs that Scarpa made were stout approach shoes, not even boots, let alone crampon compatible boots - but that is exactly what the Zodiac Techs are.

Winter scrambles

I imagine Scarpa designed them primarily as a summer alpine boot, particularly well suited for routes where you need to cross glaciers or snowfields on the approach but then carry the boots in a pack when doing technical climbing, but I’ve found them to make an excellent scrambling and hiking boot for UK conditions too. I have used them in UK winter conditions now, including for a simple climb on ice up one of Kinder’s cloughs, and have traversed Crib Goch in marginal winter conditions (scrambling on snow covered rocks, but I didn’t need to use the crampons that were in my pack), and don’t doubt that they will work well for fast moving days of winter hillwalking and easy winter climbs. They have so far proven to be very weather resistant; the GTX bit of their full name is an obvious nod to their suitability to the wet and muddy hills of Britain. I have heavier, warmer and stiffer boots for days of pitched ice or mixed climbing, midwinter, but will happily use the Zodiac Techs for winter ridge scrambles or easy snow gullies where I would be either soloing, or just pitching occasionally. With a decent pair of gaiters, they kept my feet warm for a hike through deep snow and a climb up soggy early season ice. Indeed they seem particularly well suited for England and Wales with their more marginal winter conditions, but I would imagine they could also be fantastic for those special alpine-like days at the end of the Scottish winter as well as the big summer scrambles like Tower Ridge or the Cullin.


The most obvious feature of these boots is their weight, or lack thereof. Scarpa says 1240 grams for a pair at size 42. This makes them marginally lighter than the Rebel Lites at 1280 grams and the Scarpa Charmoz at 1440 grams. Only Scarpa’s new super high-tech sort-of-trainer-sort-of-mountain-boot, the Ribelle, is lighter - but only by 20 grams and at almost double the price. The Zodiac Techs, except for their stiffness, feel like a pair of lightweight summer hiking boots. This is great whether they are on your feet or being carried. They are made of a tough suede and have a high rand that gives lots of protection to the lower boot. The cuff of the boots is snug with elastic and this keeps most sand and grit out of the boot if you aren’t using a gaiter of some type. This works well and will increase the longevity of the goretex liner to the boot.
The Zodiac Techs are definitely a boot compared to original approach shoe version, but the ankle isn’t particularly high or supportive - back in the early summer I went over on my ankle (my dodgy ankles, not the fault of the boots) while wearing them walking down from Kinder. I sat with my ankle in a cold stream for some time, envisaging a sunny Derbyshire version of Touching the Void and Simpson’s lonely crawl down the glacier, but eventually got the boot back on and hobbled back down to my car relying on my walking poles. Some argue that the idea that ankle support from any boots is more imagined than real for all boots, but with these boots in particular the ankle is both relatively low and soft. Nevertheless, the plus side of this is when you climb in the Zodiacs you have good ankle mobility.

The Zodiac Techs are clearly boots designed for climbing in. On scrambles they have worked superbly. The classic Vibram sole grips as well as any on even wet and green rock and the boots’ rigidity make standing on small holds feel secure. I recently used them descending Y Gribin from the col between Lliwedd and Snowdon. I was below the snowline but the wind was screaming and the ridge was getting covered in sleet and wind-driven hail; far from perfect scrambling conditions. Standing on little nicks on otherwise lichenous slabs in the Zodiacs, as I picked my way down towards Glaslyn, felt like standing on front points on a slab of ice - confidence inspiring considering the tricky conditions. Most recently I have used the Zodiacs with semi-automatic “C2” crampons and it felt secure standing on the front points in them, on easier angled ice at least. Nevertheless, despite this underfoot stiffness when climbing in them, they are not uncomfortable boots to hike in. I’ve never got a blister from them, even when wearing them for 20 km days when they were brand new.


Overall I’ve been very impressed with the Zodiac Tech GTX. They show no real signs of wear after plenty of use over the last seven months, and if your ambitions don’t go beyond scrambles and easy winter climbs, these remarkably light boots may be all you need for the British mountains as well as being clearly well suited to summer alpine and sub-alpine peaks.


Tuesday, August 04, 2015

The Stanage VS Challenge - a two thirds-successful attempt.


Me, climbing sideways on "Rubber Band", route 9 of 24.
Yes, I know, technically speaking being two thirds successful is still a failure, but lets try to take an optimistic view on life eh? So here's what happens when myself and my mate Tony had a go at the Stanage VS Challenge.

I've spent a fair bit of time at Stanage over the last year; I was always a bit sniffy about gritstone previously. Not that there is anything particularly wrong with it, but there are lots of British (well, English) climbers who don't seem to see much past it. Grit climbing is great, but if you start your climbing in a non-gritty area of the UK, you can see there are lots of other types of British rock and British climbing. Yet, for Sheffield residents it IS just very convenient. 20, 25 minutes in the car and you have thousands of routes, at all grades, many with real historical resonance too. And so I've been going lots, and as a result getting lots of routes climbed. Of all the grit crags, Stanage is the most impressive. It is so popular and well known, it's almost a cliche; but when you stand on the top of cliffs at "Popular End" and watching the edge sweep away northwards - about 6 kms, not unbroken but pretty consistent cliffs along that stretch - it really is one of the most impressive sights in England. But it is not the Alps though, or the high mountains of the Norwegian Arctic. Few of Stanage's rock climbs reach 20 mtrs in height. If you want to have a BIG day out climbing, you are going to have to climb a LOT of routes. 

Stanage Popular End, on a nicer afternoon.
I'm not quite sure why Tony and I decided we should do something challenging in an endurance way like this. Tony's finger is recuperating, stopping him from hard sport climbing currently but he is still very 'climbing fit' as long as he doesn't have to crimp hard. I had read about the VS Challenge since moving to Sheffield and having done a number of the routes involved, fancied my chances. John Roberts, whose blog post seems to be the modern spark for this silly idea, has set the rules: all the routes on Stanage that get the grade VS (Very Severe) and have stars. Stars, normally *, ** or *** are given in guidebooks to denote quality of climbs, three being the best. The grade VS, despite sounding, well, very severe is actually very much a 'mid grade' these days. Most keen climbers will get to climb VS with experience and practice, even if they don't train at a climbing wall or have much natural ability. Many young climbers climb VS very quickly and progress well past it. Nevertheless it retains some historical cache, as "serious" grade for "serious" climbers and VS climbs on gritstone can often be quite brutal or physical, even if you don't need seriously strong finger strength to do them. One quirk of the challenge is it is based on the 1989 Stanage guidebook - there are probably more starred VSs in the newest guidebooks BUT there are a few "sandbags" (routes harder than their given grade) in the 1989 list, so you need to be willing to climb a bit harder than your normal VSs to do the challenge. The rules also state no soloing, all climbs are to be led or seconded by a team. This seems very sensible, soloing with tired arms is not a great idea.


Route 13, Mississippi Buttress Direct
We arrived at Stanage at 7 am, first car in the often full car park. We were climbing within 10 or 15 minutes. We decided to start at Popular End thinking we would do those routes early and avoid any queues. The first climb is Heather Wall, which is one of the first routes I did at Stanage sometime back in the 90s. Easy. Tony led the first five routes, then I did a block of five leads. I'm not sure if its true, but this is deemed to be quicker than alternate leads. The first routes where I seconded flew past, but we also cocked up - I had marked up the guidebook making easy to see on each page which route we needed to do, but in my haste I didn't look carefully enough at the topo-photo for Narrow Buttress and we shot up one climb only to realise we had done the wrong line. Tony quickly rectified this and blasted up the real Narrow Buttress, but it wasted probably 15 or 20 minutes. 

Route 14, Louisiana Rib
I took over the leading at Central Trinity, a route I've done before once or twice and really like. Solid hand jams, easy to place mid-sized cams. Bang - done. Bring Tony up. Hargreaves’s was next, a route I had led nearly 15 years ago on one of my last days in England before moving to Helsinki and starting that phase of life. It was a bit more delicate than I remembered, but perhaps I'm just more of a wuss now. Inverted V - another one I had done back in 1999, the year I started my PhD in Manchester - feeling like half a lifetime away. Ellis's Eliminate was my first onsight of the day (a route I hadn't climbed before). Not much for your feet on the traverse but solid if slightly odd horizontal hand-jamming. The next route is Rubber Band, again onsight for both of us and yet more weird horizontal jamming. Tony’s next block of leads included the first “mystery route” – Via Roof Route. It isn’t in my Rockfax guide and the description in the BMC guide is a bit confusing. The lower slab is very technical, Tony did a great job balancing up it on the lead with no gear in. It was spitting rain by the time Tony led Hell Crack (route 15) and then I took over to do the tricky Stepladder Crack (route 16). The next route was the Nose, which I found hard work and a bit scary – I’m glad to have done it, but didn’t enjoy the process. As we walked to the next route, The Punk, it started chucking it down. We pulled on waterproofs and hid under the big roof that the Punk traverses. Psyche was low for me at this point but it was a good excuse for a rest, food and coffee. The rain stopped, but more grey clouds were racing across from the Kinder Plateau. The strong winds did mean the rock dried very quickly though. After the pause, I led the Punk. Yet more bizarre sideways jamming and not much for you feet. I had to fight more than I would expect to on a VS and came worryingly close to falling at one point. 17 routes in, my shoulders and arms were starting to tire noticeably; I tried leading the next route – Cleft Wall Superdirect but thought the overhanging traverse with little for your feet felt desperate. I lowered off, my first failure of the day, and Tony blasted up it. But even seconding, I still think the moves are too hard to be VS. It’s sister route Cleft Wall was next. It is meant to be harder than its sister at 5b, but I think is actually the easier of the two.

Stanage on a nicer afternoon, a couple of weeks ago.
First rain, hiding under "the Punk"
Moving down to the Plantation area Tony put in a sterling effort on Wall Buttress (route 21), a bit of beast with some offwidth action in the middle. With more rain falling I then led Paradise Wall. In the rain and needing to places lots of runners in case I slipped off the sopping and polished holds, it didn’t feel much like paradise. The rain eased off for a bit as Tony seconded, so I carried on and sent Pegasus Wall and Valhalla, two VSs I haven’t done before. As we walked down from Valhalla the rain started again and soon it was bucketing down: water trickling down the cliff faces and soon the ground had streamlets running down it. We ran for one of the big trees below the cliff for some cover, but even under its canopy the rain was still dripping through. The edge itself disappeared into low cloud. We had our rain jackets on but we were both quickly soaked to the skins on our lower halves, water squelching out of my trainers as I walked! We waited half-heartedly for a bit, hoping it might clear, but looking across the Hope Valley there was no let up in the grey clouds racing towards us. The decision was made, soaking harness were taken off and packed with the rest of the soggy gear and we walked down to the road and back along to the car.

Tony, the offwidth master, taming Wall Buttress, Route 21.
Soggy climber bailing
Postmortem: quitting at 24 routes in at 17.30 suggested we would have been doing the last couple of climbs by head torch, but if it hadn’t rained earlier and we hadn’t done one route by mistake we might have been on schedule though to finish in the light. Tony wants to try again later in the summer, so an earlier start seems obvious. I was pretty tired after 24 routes. I’m not sure how I would have fared on another 12 but Tony was still going full gas. He does train though, so there is probably a lesson in there for me! I’ve climbed (and also hiked) far more metres in a day on alpine routes like Sydpillaren, but the climbing on routes like that is so much less sustained. If you really are a VS climber, i.e. VS is the best grade you can reliably onsight, then I think the Stanage VS Challenge might be too hard for you. That’s definitely how I felt. I’ve only onsighted one grade harder this year, a handful of HVSs and I have never led E1 on natural grit. So 24 routes just below my limit was a lot, I don’t think Tony ever felt he was likely to fall off, but I felt that a number of times towards the end. If we do it again he might need to lead a few more of the final ones!

Fancy giving it a go? The list of routes is here on UKClimbing.

Wednesday, July 29, 2015

Bikepacking around the Peak District


Since moving to Sheffield nearly a year ago I’ve been getting out into the Peak District and beyond quite a lot, but this has been mainly focused on climbing. I’ve ridden a lot for commuting during the week, keeping my cycling legs ‘in’ that way, but have had few opportunities for riding for pleasure. So now having finished my course, and having some time, I decided to get out and explore the Peak by bike. I didn’t want to ride on roads but I sold my trusty old mountain bike as part of our massive ‘life-streamlining’ before we moved from Helsinki. Hence I was going to need to find a route that I could do on my cyclocross bike as besides my roadie, that was the tool to hand.

On the trail in the White Peak.

Cromford Mill - first sparks
 of the industrial revolution.
There is definite sweet spot for off-road riding on a cyclocross bike (CX). Too smooth and you might as well be road biking on a lighter, faster bike. Too rocky and technical and it just feels like your teeth are going to rattle out of your head and you just want a mountain bike with suspension. In England and Wales the law helps define that sweet spot though; bikes have no right of way on footpaths, you are only allowed to ride on bridleways. In many parts of the country, bridleways are often farm tracks – they can be rough or muddy but in rural areas they usually are drivable for a Landrover or a tractor and the determined CX rider. The route I took followed bridleways throughout, so I was fully 'legal', although much of it made use of more modern cycle routes using old, dismantled railways lines - thanks to the brilliant Sustrans organisation that is creating a network of long distance routes across the UK for non-motorised traffic.

I started south of Chesterfield in the town of Clay Cross - my wife had to go that way for work that morning so it got me quickly away from Sheffield and towards some unfamiliar terrain. After the first 15 kms or so on quiet country lanes I dropped down into the Derwent valley just south of Matlock. Crossing the river and the Cromford Canal at High Peak Junction you get onto the High Peak Trail, and old railway line and now a national cycle route. You generally think of railways as being flat or nearly so, which makes dismantled ones such great cycle routes, but this is not the case here! The 19th century engineers needed to include massive inclines to get the railway up out of the river valley. Static locomotives were used to help trains haul or lower their loads up or down these inclines. They are not so steep as to be impossible to ride, but they are quite unlike road climbs for the cyclist: arrow straight and of a completely consistent angle, there is really nowhere to hide and no brief easings of angle as you toil up them.

Above the inclines.
On to the Pennine Bridleway.
The inclines take you up above the Matlock valley where you can see numerous quarries, abandoned and still working, and factories and their chimneys - again both empty and still in use. It is a lovely, verdant valley but it set a theme that is ever present in the Peak District: although now a rural area of great beauty, there are signs of past industry everywhere. It's strange but as the economy has changed so much in the post-war period, large parts of Britain have in effect been "re-wilded", or at least "re-ruralfied". Places which were once alive with the industry of both workers and their capitalist bosses; places of production, social conflict and social progress have slipped back into being rural backwaters where once again agriculture is the main industry. It is now the turn of people in the Far East and the Global South to go through those huge social and economic changes that took place in the valleys of the Peak District 18th and 19th centuries.

Once out into the open countryside of the Southern Peak, the High Peak trail allows rapid smooth riding westwards through limestone country. Limestone is not my favourite rock for climbing on, but it does mean wonderful wild flowers. The cuttings and banks of the railway line were alive with yellows, blues, pinks, purples and more, and buzzing with insect life. Occasionally I could see beautiful Common Orchids growing. The wildlife might not be as exciting as you might see in Finland, but the odd deer, rabbit and voles came into view and hovering kestrels were ever present. The High Peak trail above the inclines also includes the starting point of the Pennine Bridleway - a newish long distance path that will take the mountain biker or horse rider all the way to Scotland if they wish, roughly paralleling its older and better known sibling, the Pennine Way. I would follow the Pennine Bridleway until lunch time on the second day, when I would swing back east towards Sheffield on the Trans-Pennine Trail.

When the High Peak Trail merges with the Tissington Trail at Parsley Hay station, it swings northwards. The station is now a bike hire place, National Park info office and cafe - the coffee and chocolate tiffin is to be recommended.

New and old industry
above Cheedale.
Perhaps 10 kms north of Parsley Hay the disused railway meets still used rails, so just before this the trail, now solely the Pennine Bridleway, leaves the cuttings and embankments of the ex-railway and follows quiet lanes and farm tracks before dropping dramatically (read: really quite exciting on CX) into the amazing limestone gorge of Cheedale. Cheedale is again a place of old industry now going backwards to rural backwater. That industry left another old railway route through tunnels and over bridges down the gorge, which now makes the lovely bike and walking route, the Monsal Trail. Modernity now comes to Cheedale in the form of some of the hardest sports climbs in the UK on the various limestone walls. But the my route just crossed the Monsal Trail and the river, going north straight up and out of the dale via a beautiful but very steep meadow - the first place I had needed to get off and push.

North of Cheedale was some of what felt like the least travelled parts of the route that I followed. For a few kms the trail felt more like a footpath than bridleway but, on the other hand, despite needing to crash through vegetation nearly choking the path in places (fortunately not too many nettles!) it gave some really good singletrack riding in places.

The limestone gorge of Cheedale.
There is a trail there somewhere!

First push, out of Cheedale.
Traversing Mount Famine.
The Peak District is made up of two quite distinct visible geologies - the White Peak, the limestone predominantly in the south, and the Dark Peak, the gritstone to the north. By now with the afternoon pressing on, the route followed quiet lanes and started to climb towards the dark bulk of the Kinder plateau. At some point a line is crossed and the drystone walls are now made of the brown grit and not the white and greys of limestone. Crossing the high road between Chapel-en-le-Frith and Castleton marks a sudden change in the feel of the trail; the next section that traverses the western flanks of Kinder at over 400 mtrs of height is really mountain-bike country.

I didn't have a mountain bike, although I like to think I impressed the the passing MTBers with my doggedness (they were probably laughing at... not with...!). The Pennine Bridleway is an impressive path at this point but it is tough technical riding in parts as you traverse towards the wonderfully named Mount Famine, a spur coming down from Kinder. I pushed more here than anywhere else on the ride, but I guess I still managed to ride 70 percent of this section. The descent down into the village of Hayfield was excellent fun, although I suspect would have been even more fun with wide bars, hydraulic brakes and 140 mms of suspension up front!
Into the Dark Peak, tough going on the flanks of Kinder.
Looking back to Hayfield and Mount Famine.
Hayfield is lovely, I had a pie and pint in the pub, stocked up on supplies from a shop and left the town following the trail very steeply up onto Lantern Pike. Once the local boisterously good-natured Scout troop that had hiked up there left, I was all alone at the top so it seemed as good a spot as any to quietly put up my tarp and camp for the night. The views of the sun setting over Manchester to the west and lighting up the slopes of Kinder to the east were exactly the type of thing that makes wild camping worth it, even in a country where it is not exactly legal.

Evening light on Kinder, with Kinder Downfall just visible.
Sunset over Manchester and the Irish Sea.
Breakfast in bed.
I woke up in wee small hours hearing rain on the tarp, but I stayed dry and warm under it and the morning dawned blue and cloudless. Following the Pennine Bridleway over some more hills and then plunging down towards Glossop was good riding. In Glossop, I finally left that route when it is crossed by the Trans-Pennine Trail (TPT). This long distance route goes from the Irish sea near Liverpool to North Sea at Hull, but I was about to follow it to its highest point as I crossed back from the west to the eastside of the Pennines. The route up Longdendale follows old railway track again so its very straight and smooth. The path leaves the old track where the rails used to go into the now closed Woodhead tunnel. The TPT instead crosses the busy A628 (it is busy with lots of big trucks - take care!) and goes steeply up a hillside (more pushing) before following a rough bridleway up to the top of pass. The Woodhead Pass is high and quite wild in a way, but definitely not "wilderness": a busy road goes over it, Longdendale has big pylons carrying electricity cables that then go under the pass using the old railway tunnel. There are also reservoirs and dams in the valley bottom. But looking up to the cloughs and crags on the northern edge of Bleaklow you can see the wild country.

Getting going on day 2. 
Rough tracks giving slower but fun riding.
Looking toward Manchester - I can see my old uni!
Across the Woodhead pass and back in Yorkshire, the TPT plunges down into the Upper Don Valley and picks up the old railway line where it emerges from the eastern end of the Woodhead Tunnels. It’s then old railway - flat, straight and fast -through Pennistone, Deepcar and taking you almost all the way back into Sheffield. Once back in city centre there just one more steep hill to slog up and I was home in time to go and pick the kids up from school.


Climbing out of Longdendale - the Woodhead tunnel is somewhere deep below my tyres.
Traffic jam on the Trans-Pennine Way.
Back into Yorkshire, all downhill now.
Overall I did 151 kms in two days, of which probably only 25 kms was on paved road, arriving home sweaty, dirty and (perhaps unusually for Northern England) dry but slightly sunburnt.

Snapshot from Strava showing the route and profile - day 1:


Snapshot from Strava showing the route and profile - day 2: